To photograph clothes for eBay and Depop, start with one well-lit place, your phone and the exact garment you are selling. Make the full item easy to recognise, then photograph the details a buyer cannot inspect in person.
Get one test image right before shooting a batch. You should be able to see the garment’s outline, its true colour and texture, and the condition details that matter to the buyer.
Prepare a small, repeatable space
Choose a clean patch of wall, a plain hanging background or a flat surface large enough for the garment. Use a neutral background that separates the fabric from its surroundings: a pale grey sheet can make a white shirt’s edges easier to see than a white bedspread. Avoid busy prints and check that the surface is clean before laying stock on it.
Keep a lint roller, suitable hanger, tape measure and clean cloth beside the space. Remove unrelated price stickers and packing materials from the frame. If you steam or iron the item, follow its care instructions and let it dry fully before storing it.
Try one garment before preparing a whole batch. If the first result needs a different background or camera position, it is easier to fix that once than reshoot twenty items.
Arrange light before changing camera settings
Start near a window with even indirect daylight. Turn the garment until its shape, surface and colour are easy to read. If one side is much darker, try repositioning it or using plain white card to reflect some light back onto it.
Avoid a bright patch of direct sun cutting across the fabric. If sunlight is harsh, change the position or time of the shoot.
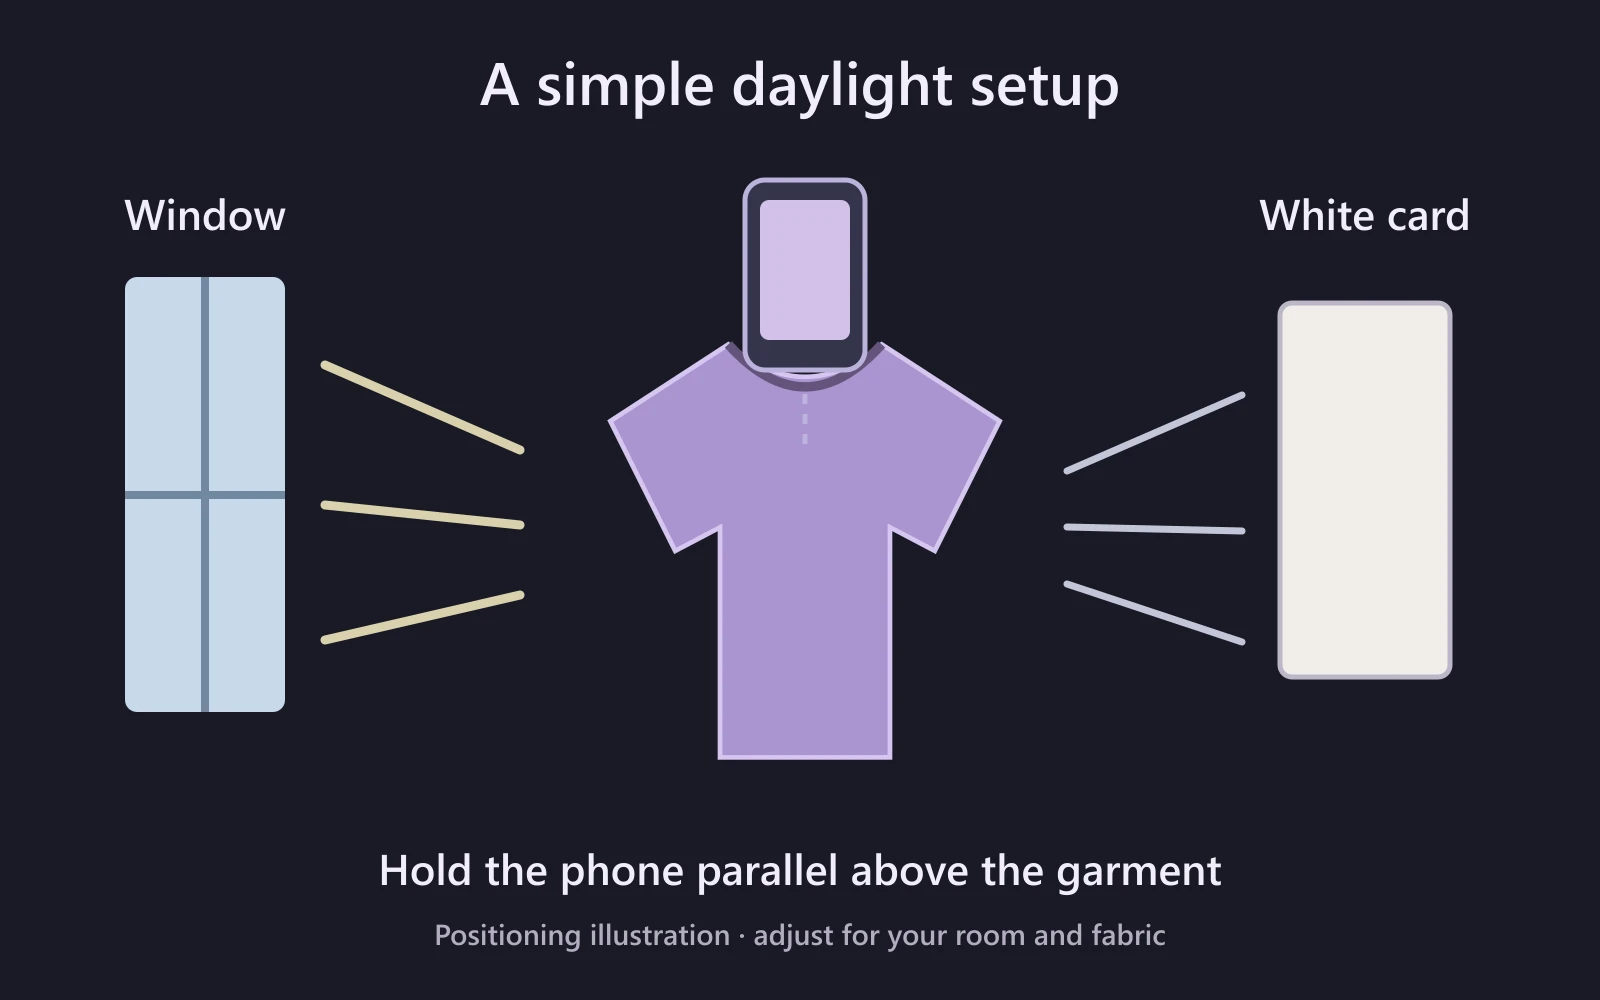
Positioning illustration: adjust this arrangement to suit your room and the actual colour of the garment.
Finish one item’s sequence while the light is similar. If a cloud passes or a room light changes the colour, check the next image before carrying on. Avoid mixing yellow room light with daylight if it gives the fabric an uneven colour cast.
Set up the phone and take a test
Clean the camera lens. Use the normal rear-camera photo mode as your starting point, with enough distance to include the garment comfortably. Check that your own shadow or reflection is not falling across it.
On iPhone, Apple’s camera setup guide explains tapping a focus point, adjusting exposure and holding to lock focus and exposure. Google’s Pixel quality guide also recommends tapping the subject to focus. Check your phone’s camera controls for the equivalent options.
For a test photo:
- Focus on the garment, not the wall behind it.
- Check the brightest fabric still shows texture.
- Check dark fabric retains its seams and shape.
- Open the saved image and zoom into a label or stitching.
- Correct the setup if the item looks blurred or the colour is misleading.
A photo that looks attractive at thumbnail size may still have unreadable labels. Inspect the saved file rather than judging only the camera preview.
Fix common clothing-photo problems
Use this checklist to adjust the setup before relying on editing:
| Problem in the saved image | What to try next |
|---|---|
| Black fabric looks like a solid dark shape | Move into more even light or add a white reflector. Adjust exposure cautiously until seams are visible without making the garment look grey. |
| A white shirt loses its texture | Reduce exposure slightly and avoid a patch of direct sun. Check that stitching and folds remain visible. |
| A label is sharp in the middle but soft at the edges | Move the phone farther away, keep it parallel to the label and tap to focus again. Check the new image at full size. |
| Colours look yellow or differ across the garment | Try daylight without the room light, then compare the saved image with the actual fabric. Avoid a filter that changes the item’s colour. |
| The top of a flat-lay garment looks narrower than the bottom | Bring the phone parallel to the surface and centre it over the item. Leave room around the edges before cropping. |
Google’s Pixel troubleshooting advice specifically covers lighting, focus and soft edges in close-ups. The garment adjustments above are practical starting points; check the result on your own phone before continuing the batch.
Choose flat lay, hanger or modelled views
Flat lay is useful for showing shape and laying a tape measure across a dimension. Smooth the garment without stretching it. Hold the phone parallel to the surface so the upper edge does not look artificially smaller than the lower edge.
Hanger photos suit items whose outline is clearer when hanging. Choose a hanger that supports the shoulders appropriately. A strap slipping off or a coat folding over itself can obscure its actual cut.
Modelled views can explain drape or length, but should supplement a clear product view. Make it unambiguous which garment is included. Styling shoes, jewellery or a belt should not accidentally look like extra bundle contents.
Use the approach that explains the specific item. You do not need to photograph every inexpensive T-shirt in all three styles.
Leave room to crop without losing the garment
Centre the item with space around sleeves, hems and straps. Do not stretch the image to force a long coat into a square. Step back, reconsider the layout or choose another view that still represents its proportions accurately.
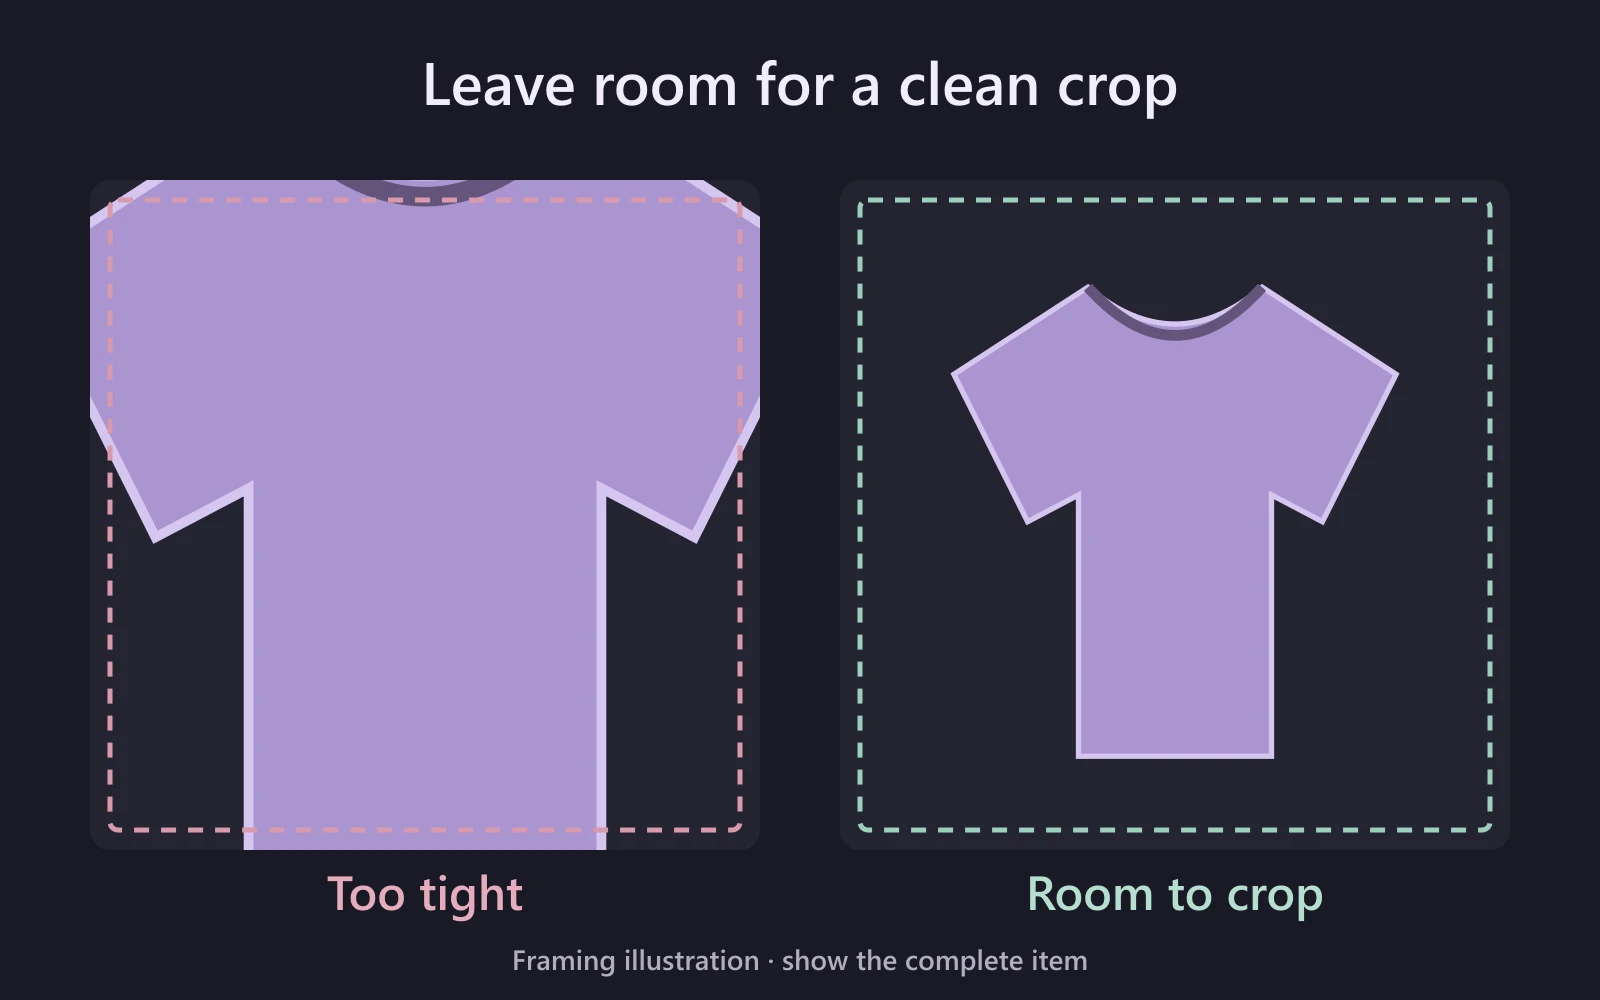
Framing illustration: the right-hand layout preserves the complete item and leaves room for a later crop.
In eBay Australia’s photo guidance, the first image should show the complete, centred item. It recommends at least 1600 × 1600 pixels and advises against graphics, text and watermarks. Keep your sharp originals before exporting a listing copy.
Depop’s listing instructions currently distinguish app and web photo limits. Our Depop dimensions guide covers those limits and separates practical crop advice from official requirements.
Use a shot list that answers buyer questions
Prepare the views below, then choose those that explain the item within the listing form’s upload limit. The cover establishes what is for sale; the remaining images should add information rather than repeat nearly identical angles.
| View | Question it should answer |
|---|---|
| Full front | What is the item, its shape and its overall condition? |
| Full back | Is the rear different, damaged or detailed? |
| Brand and size label | What does the actual tag say? |
| Fabric and care label | What material and care information is supplied? |
| Construction or feature | How does the fastening, print, texture or pocket look? |
| Measurement | Where was the tape placed and what does it show? |
| Condition detail | What wear, alteration or flaw should the buyer know about? |
| Useful alternate view | Does a second angle explain drape, length or an important detail? |
If you have fewer slots than useful views, prioritise the complete garment, its identifying label and any condition issue. For a plain shirt, front, back, label and flaw photos may explain more than four styled front views. Describe any relevant information you cannot show clearly, or use another available upload method that accommodates it.
Show a flaw in context as well as close-up. A tiny image of a dark spot is difficult to interpret without knowing where it sits on the item. Pair the photograph with a clear description such as “small mark on left cuff”, rather than expecting the buyer to infer everything from the image.
The printable measurement guides help keep tape placement consistent. Show both ends of the measurement and make the tape markings readable, so the buyer can see exactly what was measured.
Edit for clarity and keep the item truthful
Crop, straighten and make modest corrections only when they help the image match the garment. Compare the result with the physical item in sensible light. Strong filters can turn faded black into deep black or disguise discolouration.
If you remove a background, inspect the edges around lace, straps, tassels and pale fabric. Keep a natural view too if an edited boundary makes the material hard to understand. Do not remove a stain or reshape the garment as part of cleanup.
Depop’s stock-image guidance asks for original photographs instead of images copied from other sources. A brand’s catalogue photo cannot show the condition of your particular second-hand item.
Reuse the work across eBay and Depop
Keep one folder or stock reference for the item, with the original files and the selected listing copies. Check the sequence after uploading: an image that was the cover in one place may appear later in another flow.
When using Listalong to cross-list between eBay and Depop, review the transferred photos with the description, size and condition. Reusing a set saves repeated work only if it still depicts the same stock accurately.
Before publishing, inspect the cover at phone size and zoom into a label and any disclosed flaw. Check that the uploaded crop still includes the whole garment and that the image order tells a clear story. Correct an unreadable detail before taking the next batch.
Frequently asked questions
Do I need an expensive camera to photograph clothes for resale?
No. Start with your phone, a clean uncluttered background and adequate light. Check the finished image at full size: readable labels, visible condition and an accurately framed garment matter more than an elaborate setup.
Can I use the same clothing photos on eBay and Depop?
You can prepare one original set of the exact item and adapt its crop and selection for each listing. Keep the full-resolution masters, check each platform’s current upload controls and ensure the photos still match the item being sold.
Should I add promotional text to my listing photos?
Keep product photos clear of promotional text, logos and watermarks. eBay’s Australian photo guide advises against those overlays. Put delivery promises, discounts and description text in the appropriate listing fields instead.
Sources and review date
Platform guidance and phone controls checked 18 October 2026 against the official eBay Australia, Depop, Apple and Google pages linked above. The shooting routine and troubleshooting checklist are editorial recommendations; the diagrams illustrate the setup and framing.